How To Patch An Air Mattress: A Step‑By‑Step FAQ Guide
If you’re searching for “How To Patch An Air Mattress”, you probably have a slow leak, a hidden puncture, or a small tear that’s ruining your sleep. This guide walks through simple, practical steps to find the leak, patch it correctly, and help your air mattress last longer.
What’s the basic process for how to patch an air mattress?
Patching an air mattress usually involves four main steps:
- Find the leak
- Clean and dry the area
- Apply a patch correctly
- Let it cure before inflating again
Most small punctures and pinholes can be fixed at home with either a dedicated patch kit or common repair materials.
How do I find a leak in my air mattress?
Finding the leak is often the hardest part of how to patch an air mattress.
Start with a quick check:
- Inflate the mattress fully and close the valve.
- Listen closely for hissing.
- Run your hand slowly over the surface to feel cool air escaping.
- Pay special attention to seams, edges, and the valve area.
If you still can’t see it, use the soapy water method:
- Mix a small amount of mild soap with water.
- Use a sponge or cloth to lightly spread the solution over suspicious areas.
- Watch for steady bubbles forming – that’s where the air is leaking.
- Mark the spot with a piece of tape or a pen once the area is dry.
Avoid soaking the entire mattress if it’s not necessary, as drying can take a long time.
What do I need to patch an air mattress?
Most repairs can be done with:
- Patch material (from a repair kit or similar flexible plastic/vinyl)
- Adhesive suitable for vinyl or plastic (if not included in a kit)
- Rubbing alcohol or mild soap and water (to clean)
- Soft cloth or paper towels
- Fine sandpaper (optional, for some vinyl surfaces)
- Heavy book or flat object (to press the patch while curing)
📝 Tip: Many air mattresses come with a small repair kit. If you have one, follow those instructions first, as they are designed for that specific material.
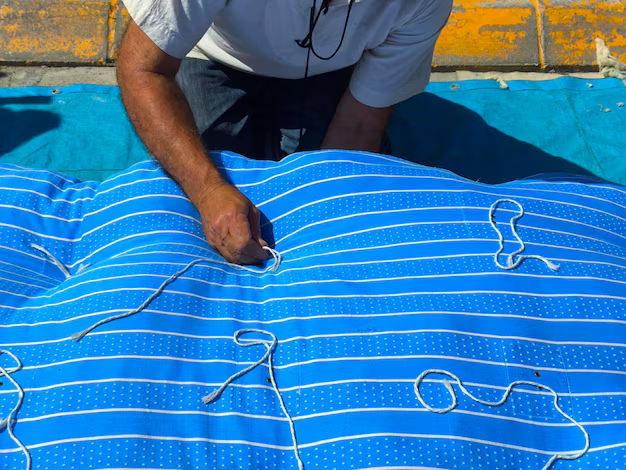
Step‑by‑step: How do I actually patch the hole?
Once you’ve found and marked the leak:
Deflate the mattress fully
This prevents air pressure from pushing against the patch while it sets.Clean the area
- Wipe around the hole with a small amount of rubbing alcohol or soapy water.
- Remove dirt, oil, and dust.
- Let it dry completely. A dry, clean surface helps the patch bond better.
(Optional) Lightly roughen the surface
On smooth vinyl, gently rubbing with fine sandpaper can help the adhesive grip.
Do not sand seams or delicate flocked (velvety) surfaces aggressively.Prepare the patch
- Cut a rounded patch at least 1–2 cm (about half an inch) larger than the hole on all sides.
- Rounded corners are less likely to peel.
Apply the adhesive
- Follow the directions on your repair kit or glue.
- Usually, you apply a thin, even layer around the leak and/or on the patch itself.
- Avoid thick globs of glue that can create weak spots.
Place and press the patch
- Carefully center the patch over the hole.
- Press firmly from the center outward to remove air bubbles.
- Wipe away any excess adhesive around the edges.
Let the patch cure
- Keep the mattress flat and do not inflate while the patch dries.
- Curing time varies, but waiting several hours, or as directed by the adhesive, usually gives a stronger bond.
- Placing a heavy, flat object on top can help keep the patch tight.
Test the repair
- Gently reinflate the mattress.
- Do not overinflate the first time.
- Check the patched area again with the soapy water method to confirm no more bubbles appear.
Can I patch different types of damage the same way?
Not always. Different issues may need slightly different approaches:
Small punctures/pinholes:
Usually respond well to a standard patch or even a small dot of appropriate adhesive.Straight cuts or small tears:
Need a larger patch that fully covers and extends beyond the damaged area.Seam leaks:
These can be tougher. Patches may not adhere as well directly on seams, and some seam failures are difficult to fix permanently at home.Valve leaks:
Sometimes the problem is a loose or faulty valve rather than a puncture in the fabric. Reseating the valve or ensuring the cap is fully closed might help. If the valve itself is damaged, home repair can be limited.
How long will a patched air mattress last?
A well-done patch on a small hole can often hold for a long time, especially if you:
- Avoid overinflating the mattress
- Keep sharp objects away from the surface
- Store it properly, fully deflated and in a cool, dry place
- Avoid jumping or heavy impact on the mattress
However, multiple leaks, large tears, or seam failures may indicate that the material is wearing out.
Are there mistakes to avoid when patching an air mattress?
Common issues include:
- Patching while the mattress is partly inflated – this can cause the patch to shift or peel.
- Skipping cleaning – dust, skin oils, and residue can weaken the adhesive.
- Inflating too soon – not giving the adhesive enough curing time reduces durability.
- Using the wrong glue – not all glues bond well with vinyl or plastic.
- Relying on temporary fixes like tape alone – these often peel quickly under pressure.
✅ Quick Mattress Takeaways
Key points consumers should understand about How To Patch An Air Mattress
- Find the leak first using sound, feel, or a soapy water test.
- Clean and dry the area thoroughly before applying any patch.
- Use a patch and adhesive designed for vinyl/plastic when possible.
- Deflate, patch, and let it fully cure before you reinflate the mattress.
- Rounded, oversized patches grip better and are less likely to peel.
- Seam and valve leaks are harder to fix and may not hold as well as simple puncture repairs.
- Gentle use and proper storage help a patched air mattress last longer.
Handled carefully, learning how to patch an air mattress can turn a frustrating leak into a manageable, at‑home repair and extend the usable life of your inflatable bed.