How To Patch Air Mattress Hole: Simple Steps to Stop the Leak
If you’re searching for “How To Patch Air Mattress Hole,” you’re likely dealing with a slowly deflating bed and wondering if it can be saved. The good news: most small air mattress leaks can be patched at home with basic tools and a little patience.
This FAQ-style guide walks through how to find the leak, how to patch it properly, and what to avoid so your repair actually lasts.
How do I find the hole in my air mattress?
Before you can learn how to patch air mattress hole, you need to locate the leak. Some holes are obvious; others are tiny pinholes that are hard to spot.
Step-by-step ways to find the leak:
Visually inspect the surface
Inflate the mattress fully and look for obvious tears, punctures, or worn spots, especially:- Around seams
- Near the valve
- On the bottom surface if it was used outdoors
Listen and feel for escaping air
Move your ear and hand slowly over the surface. You may hear a faint hissing or feel a small stream of air on your skin.Use soapy water for hard-to-find leaks
- Mix a small amount of dish soap with water.
- Lightly sponge or spray it over sections of the mattress.
- Watch for steady bubbles forming – that usually marks the leak.
Once you find the hole, circle it with a marker so you don’t lose it when the mattress deflates.
What materials do I need to patch an air mattress?
You don’t always need a special kit, but using patch materials designed for inflatables often gives the most reliable result.
Typical supplies include:
- Patch material (from a repair kit or thin, flexible plastic/vinyl)
- Strong adhesive suitable for plastic or vinyl
- Rubbing alcohol or mild soap and water (for cleaning)
- Soft cloth or paper towels
- Fine sandpaper (optional) if the surface is glossy
- Heavy book or flat weight to press the patch while it cures
If your mattress came with a repair kit, following those instructions is usually the safest option.
How To Patch Air Mattress Hole: Step-by-Step
Here is a clear, general process most people can follow:
Deflate the mattress completely
Patching a fully or partly inflated mattress can stretch the patch and weaken the bond.Clean the area around the hole
- Wipe the surface with mild soap and water or rubbing alcohol.
- Remove dirt, body oils, and dust.
- Let it dry completely before applying any adhesive.
Lightly roughen the surface (if needed)
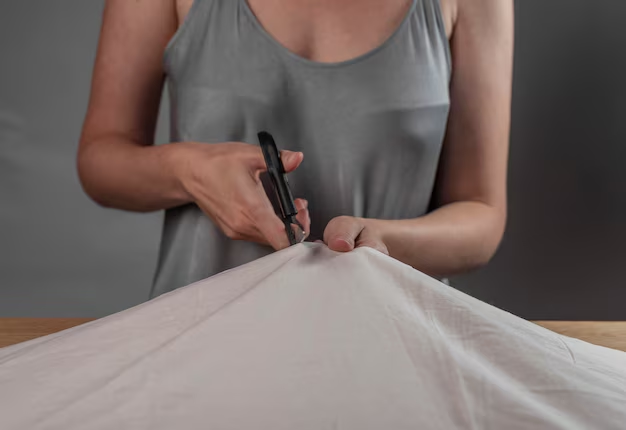
On very smooth, shiny surfaces, gently rubbing with fine sandpaper can help the glue adhere. This should be light and limited to the area where the patch will sit.Cut the patch to size
- Make a patch that extends at least 1–2 inches beyond the hole on all sides.
- Round the corners to reduce the chance of peeling.
Apply the adhesive
- Follow the directions for your specific glue.
- Usually, you apply a thin, even layer to the mattress area, and sometimes to the patch as well.
Press the patch firmly in place
- Smooth out any bubbles or wrinkles.
- Apply even pressure for several minutes.
Let the patch cure fully
Many adhesives need several hours (or more) to reach full strength. Keeping the mattress flat during this time helps.Reinflate and test
- Inflate the mattress gradually.
- Check the patched area by listening, feeling, or using a small bit of soapy water to confirm there’s no more leaking.
Can I use household items to patch a hole in an air mattress?
People often ask if tape or everyday glues can work. They sometimes help short-term, but they’re not usually as durable:
- Duct tape or packing tape:
May seal small holes temporarily but can peel away when the mattress flexes or warms up. - Glue alone (without a patch):
Often cracks or pulls away over time because the material expands and contracts. - Fabric patches:
May not bond well to plastic or vinyl surfaces, especially under pressure.
For a longer-lasting fix, a proper patch plus compatible adhesive is usually the most reliable approach.
What if the hole is on a seam or near the valve?
These spots are trickier because there is more stress and movement.
- Seam leaks:
Sometimes patching over the area works, but if the seam itself has separated, it may keep opening under pressure. - Valve leaks:
Check that the valve is fully closed and seated. If air escapes from inside the valve assembly, it may be harder to repair at home.
In both cases, even a careful patch may not last as long as one placed on a flat area.
How can I prevent air mattress holes in the future?
A little care can reduce the chance of new leaks:
- Use the mattress on a smooth, clean surface, not directly on rough floors or outdoors without a barrier.
- Avoid overinflating, which puts extra strain on seams.
- Keep pets with sharp claws away from the sleeping surface.
- Store the mattress completely dry, loosely rolled or folded, away from sharp objects and direct heat.
✅ Quick Mattress Takeaways
Key points to remember about How To Patch Air Mattress Hole:
- Locate the leak first using sight, sound, touch, or soapy water to find bubbling air.
- Clean and dry the area thoroughly before patching for better adhesion.
- Use a patch that fully covers the damage, extending beyond the hole with rounded corners.
- Apply compatible adhesive and firm pressure, then allow enough curing time before reinflating.
- Temporary fixes like tape may work briefly, but a proper patch usually lasts longer.
- Seam and valve leaks are harder to repair and may not respond as well to standard patch methods.
- Careful use and storage can help reduce new holes and extend your air mattress’s usable life.
With these steps, understanding how to patch air mattress hole becomes more straightforward, and many minor leaks can be managed without replacing the entire mattress.