How To Mattress Stitch: A Simple Guide to Neat, Durable Seams
If you’re searching for “How To Mattress Stitch”, you’re most likely looking for a clear way to join two edges of fabric, panels, or covers with a nearly invisible seam. In the context of mattress use & care, mattress stitch is especially helpful for repairing mattress covers, toppers, or quilted protectors without leaving a bulky ridge.
Below you’ll find a practical FAQ-style guide to what mattress stitch is, why it matters, and how to do it step by step.
What Is Mattress Stitch?
Mattress stitch is a hand-sewing technique used to join two edges so that the seam is:
- Flat
- Strong
- Almost invisible from the outside
Although the name sounds like it comes from mattress construction, the stitch is also widely used for knitting and fabric work. For sleep products, people often use it to:
- Close an opening in a mattress cover after spot repair
- Rejoin a ripped seam on a pillow-top or mattress pad
- Neatly repair quilted mattress protectors or encasements
The goal is a seam that doesn’t create a lump you can feel through the surface and blends into the existing stitching as much as possible.
Why Would You Use Mattress Stitch On Mattress-Related Items?
Mattress and bedding surfaces are under constant pressure and movement. A rough, raised repair can:
- Be felt through thin bedding
- Catch on sheets or clothing
- Put extra stress on nearby fabric
Using mattress stitch instead of a quick, bulky repair (like big overhand stitches) helps keep the surface:
- Smoother against your sheets
- More comfortable to lie on
- Less likely to fray further at the edges of the rip
For small tears or opened seams on covers and protectors, learning How To Mattress Stitch can extend the life of those items and keep your sleep surface looking tidy.
What Tools Do You Need To Mattress Stitch?
You don’t need anything complicated. Most people can get started with:
- Thread in a color that matches or blends with the fabric
- Hand-sewing needle (sharp point for woven covers; a slightly thicker needle for dense quilting)
- Small scissors for trimming thread
- Pins or clips (optional) to hold edges together
- Good lighting so you can clearly see the individual stitches or fabric loops
For thicker mattress covers or quilted protectors, a stronger thread can help the repair hold up to regular use.
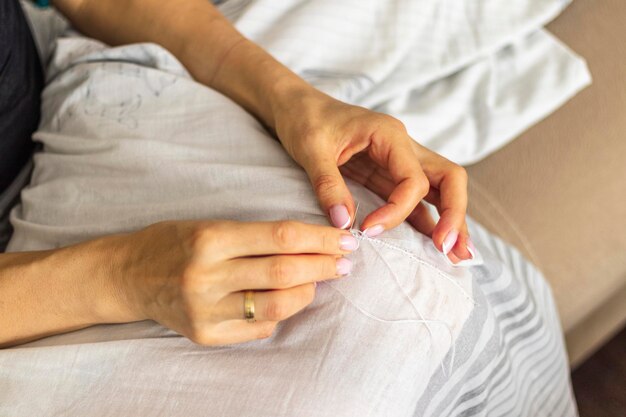
How To Mattress Stitch: Step-by-Step Guide
1. Prepare the Fabric Edges
- Lay the item flat on a stable surface.
- Gently smooth the fabric so the two edges of the tear or opening line up.
- If needed, pin or clip the edges in place so they don’t shift while you sew.
2. Thread and Secure Your Needle
- Cut a length of thread that’s comfortable to work with (often about the length of your arm).
- Knot one end of the thread.
- Start from the inside of the fabric or within the seam allowance so the knot is hidden when you’re done.
3. Identify Where You’ll Stitch
For mattress covers and similar fabrics, the basic idea is:
- Work across the gap, taking tiny bites of fabric from one edge, then the other.
- Stay very close to the fold or original seam line, so the join is neat and flat.
Think of it like lacing up a zipper: you alternate from one side to the other, pulling the gap closed.
4. Begin the Mattress Stitch
- Insert the needle from the back side of the left edge, coming out close to the fold or seam line.
- Cross to the right edge and take a small horizontal stitch through the fabric fold, again close to the edge.
- Move back to the left edge, take another small stitch parallel to the first.
You’re creating a sequence of tiny horizontal stitches that alternate from left to right, with thread bridging the gap.
5. Tighten Gradually
Every few stitches:
- Gently pull the thread to snug the edges together.
- Watch the seam close up like a zipper.
Avoid pulling so tightly that you pucker the fabric; the goal is flat and smooth, not gathered.
6. Finish and Secure the Seam
When you reach the end of the tear or seam opening:
- Take a couple of extra small stitches in place to anchor the thread.
- Tie a discreet knot on the inside or within the seam allowance.
- Trim the thread, leaving a tiny tail that you can tuck inside if possible.
Run your fingers over the area. A good mattress stitch should feel almost level with the surrounding surface.
Common Questions About Mattress Stitch for Mattress Care
Can I Use Mattress Stitch On Any Mattress Tear?
It works best for:
- Opened seams where stitching has come undone
- Small, clean tears in a cover or protector
It’s not ideal for:
- Large, jagged rips
- Damage that exposes inner mattress layers or structural components
In those cases, many people prefer professional repair or replacement of the outer cover rather than a home fix.
Should I Use Matching Thread?
Yes, if possible. Matching or slightly darker thread:
- Helps hide the repair
- Makes the mattress stitch blend with existing seams
If you only have contrasting thread, just focus on even, small stitches; neatness can still make the repair look more intentional.
Will Mattress Stitch Make a Lump I Can Feel?
When done carefully, mattress stitch is designed to be low profile. To keep it comfortable:
- Use small, consistent stitches
- Avoid stacking layers of fabric on top of each other
- Smooth and flatten the area after stitching
✅ Quick Mattress Takeaways
Key points consumers should understand about How To Mattress Stitch
- Purpose: Mattress stitch joins two fabric edges with a flat, discreet seam that’s useful for repairing mattress covers, toppers, and protectors.
- When to use it: Best for small tears and opened seams; not for major structural damage to the mattress itself.
- Tools needed: Needle, matching thread, scissors, and good lighting are usually enough.
- Basic method: Alternate tiny stitches from one edge to the other and gently tighten to close the gap like a zipper.
- Result to aim for: A seam that feels smooth, lies flat, and blends in visually with the original fabric and stitching.
Knowing How To Mattress Stitch gives you a practical way to keep mattress covers and related bedding items looking neat and feeling comfortable. With a bit of patience and careful stitching, many small fabric issues can be managed at home, helping you maintain a smooth, restful sleep surface.