How To Fix a Hole In Air Mattress: Step‑by‑Step FAQ Guide
If you’re searching for “How To Fix a Hole In Air Mattress,” you’re likely dealing with a bed that keeps deflating overnight. This guide walks through how to find the leak, seal it properly, and decide when a repair is worth it.
How do I know if my air mattress has a hole?
If your air mattress slowly loses air even when the valve is fully closed, it probably has a leak. Common signs include:
- The mattress feels firm at first but softens in a few hours.
- You hear faint hissing when you press on certain spots.
- You can’t reach your usual firmness no matter how much you inflate it.
Before learning how to fix a hole in air mattress, it helps to confirm where the air is escaping.
How do I find the hole in an air mattress?
Step 1: Check the obvious areas
Start with:
- Valve and cap – Make sure the valve is fully sealed, clean, and not cracked.
- Seams and edges – Many leaks happen where the top and bottom layers are joined.
Visually inspect for small scratches, punctures, or loose stitching in these areas.
Step 2: Use the “soapy water” method
If you cannot see the leak:
- Inflate the mattress until firm.
- Mix a little dish soap with water in a bowl or spray bottle.
- Apply the soapy water to the surface in sections.
- Look for bubbles forming or growing—this shows where air is escaping.
Mark each leak with a pen or a small piece of tape, then dry the area thoroughly.
Step 3: The “listening and feeling” method
In a quiet room:
- Press down on the mattress and listen for hissing.
- Feel for faint air movement on your cheek or hand near seams and the valve.
This is especially useful for very small leaks.
What do I need to fix a hole in an air mattress?
For most basic repairs, you’ll need:
- Mild soap and water (for cleaning)
- A clean cloth or paper towel
- Fine sandpaper or a rough cloth (for some vinyl surfaces)
- A patch (from a repair kit or made from similar material)
- Suitable adhesive designed for plastics or vinyl
- Something flat and heavy to press the patch while it cures
Always check the mattress tag or instructions for any repair guidelines or material notes.
How To Fix a Hole In Air Mattress: Step‑by‑Step
1. Prepare the mattress
- Deflate completely so the surface is flat.
- Lay the mattress on a clean, dry, level surface.
- Clean the area around the hole with mild soap and water; let it dry fully.
If the material is glossy vinyl, lightly roughen a small area around the puncture with fine sandpaper. This can help the adhesive bond better. Avoid sanding fabric‑topped surfaces.
2. Cut and prepare your patch
If you’re using a patch:
- Cut a rounded patch (no sharp corners) that is at least 2–3 cm larger than the hole on all sides.
- Make sure the patch and mattress are completely dry and dust‑free.
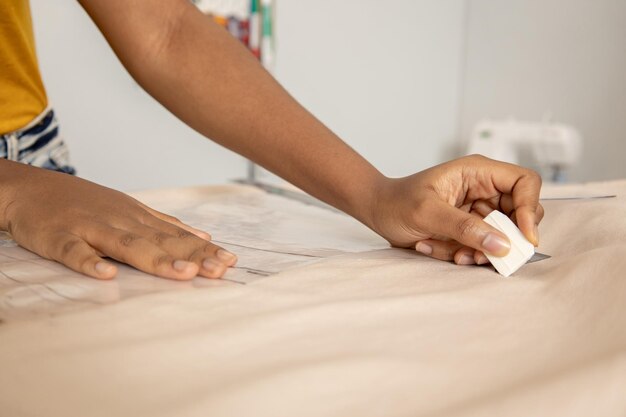
3. Apply adhesive and patch
- Apply a thin, even layer of adhesive around the hole and on the back of the patch (if recommended by the adhesive instructions).
- Wait a short time if required (some adhesives bond best after a brief drying period).
- Place the patch over the hole, starting from one side and pressing out any trapped air.
- Smooth it firmly with your fingers or the edge of a card.
Place a flat object and some weight (like books) on the patch area while it cures, if the mattress design allows pressure there.
4. Let it cure fully
Give the patch plenty of time to set. Many adhesives need several hours or more before they reach full strength. Keeping the mattress deflated during this time usually helps the bond.
5. Re‑inflate and test
Once cured:
- Inflate the mattress to normal firmness.
- Check the patched area with soapy water again or by listening closely.
- If no bubbles or hissing appear, the repair is likely successful.
Can I use household items to patch a hole temporarily?
People sometimes try tape, glue, or stickers for quick fixes. These can work only as very short‑term solutions:
- Regular tape often peels away when the mattress flexes.
- Some glues become brittle and crack.
For a more reliable repair, a proper patch and adhesive designed for the material typically hold better and last longer.
What if the hole is on a seam or near the valve?
Seams and valves can be harder to repair:
- Seam leaks: A simple flat patch may not seal well if the surface is uneven. You may need to carefully apply adhesive into the seam and press it together while it cures.
- Valve leaks: Sometimes cleaning the valve, resetting it, or ensuring it fully closes is enough. If the valve itself is damaged or cracked, it is often more difficult to fix permanently.
If leaks are spread across multiple seams or the valve is failing, replacing the air mattress may be more practical.
How can I prevent future holes in my air mattress?
A few habits can reduce punctures and slow wear:
- Use a smooth, clean base under the mattress (no sharp objects, pet claws, or rough flooring).
- Avoid over‑inflating, which puts extra stress on seams.
- Keep food, drinks, and sharp items away from the sleeping surface.
- Store the mattress clean, dry, and loosely rolled or folded according to any included care instructions.
✅ Quick Mattress Takeaways
Key points consumers should understand about How To Fix a Hole In Air Mattress
- Confirm the leak first using soapy water, listening, or feeling for escaping air.
- Clean and dry the area thoroughly before any repair.
- A proper patch and compatible adhesive usually provide the most reliable fix.
- Let the repair fully cure before re‑inflating and using the mattress.
- Seam or valve leaks can be harder to fix and may not always hold long‑term.
- Careful use and storage help prevent new holes and extend the life of the mattress.
With a bit of patience and the right materials, learning how to fix a hole in air mattress can restore your sleeping surface and delay the need for a replacement.