How To Do The Mattress Stitch In Knitting: A Simple Guide (And Why It Matters for Mattress Care)
If you’re searching for “How To Do The Mattress Stitch In Knitting”, you’re likely trying to learn how to join two knitted pieces together with an almost invisible seam. While this is a knitting technique, it often comes up in the context of mattress covers, mattress toppers, and knitted bed accessories like throws and pillow covers. This guide explains the stitch clearly and connects it to practical mattress use & care.
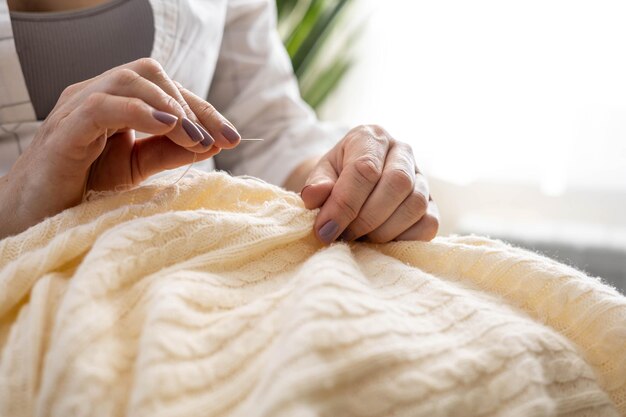
What Is the Mattress Stitch in Knitting?
The mattress stitch is a way to seam two pieces of knitting edge to edge so the join looks smooth and clean from the front. When done correctly, the seam is:
- Nearly invisible on the right side
- Flat and comfortable
- Strong enough for items that see daily use, like bed throws or removable knitted mattress covers
This makes the technique especially useful when you want a tidy look on bedding or mattress accessories without bulky seams that might show under sheets or create pressure points.
Why Learn the Mattress Stitch for Mattress-Related Items?
For mattress use and care, you might use the mattress stitch when:
- Finishing a knitted mattress or pillow cover
- Joining panels of a knitted bedspread or throw that will sit directly on your mattress
- Repairing a knitted piece that protects or decorates your mattress
A clean seam helps your bed surface stay smooth, which can:
- Make fitted sheets lie more evenly
- Reduce bunching or ridges under your body
- Keep decorative pieces looking neat over time
How To Do The Mattress Stitch In Knitting: Step-by-Step
Here’s a basic method for stockinette stitch pieces (the most common situation for mattress stitch).
1. Prepare Your Work
- Lay both knitted pieces flat, right sides facing up
- Align the edges you want to seam
- Thread a tapestry (yarn) needle with a length of the same yarn used for knitting, or a smooth matching yarn
2. Find the “Bars” Between Stitches
On the edge of each piece, look closely between the first and second stitch from the edge.
You’ll see horizontal strands (often called “bars”) running between the V-shaped knit stitches.
These bars are what you’ll be weaving the yarn through.
3. Anchor the Yarn
Start at the bottom of the seam:
- Insert the needle from the wrong side to the right side at the very edge of the first piece
- Pull the yarn through, leaving a small tail you can weave in later
4. Work Across the Seam
Now alternate between the two pieces:
- On Piece A, insert the needle under two horizontal bars between the first and second stitch from the edge. Pull the yarn through gently.
- Move to Piece B, insert the needle under two bars in the same way, and pull through.
- Repeat: two bars on Piece A, then two bars on Piece B, working your way up.
Keep the stitches evenly spaced so the seam matches the natural row spacing of your knitting.
5. Tighten Gradually
After several passes (about 2–3 cm of seam):
- Gently pull the working yarn to snug up the stitches
- You’ll see the edges zip together, creating a neat, almost invisible seam on the right side
Avoid pulling too hard; you want the seam to match the natural stretch and tension of the fabric so it lies flat on your mattress or pillow.
6. Finish and Secure
When you reach the top:
- Take one last stitch to secure the join
- Weave the remaining yarn into the inside of the seam, then trim
- Repeat at the starting tail if needed
Common Questions About Mattress Stitch and Mattress Care
Does the mattress stitch create a bulky seam?
When done correctly, the mattress stitch creates a flat seam that blends into the fabric. For mattress-related items, this is helpful because:
- It is less likely to be felt through sheets
- It helps bed covers and toppers lie smoothly
Bulky seams usually come from pulling too tight or seaming too close to the very edge stitches instead of using the inner “bars.”
Can I use the mattress stitch on ribbing or garter stitch?
Yes, but the method adjusts slightly:
- On garter stitch, you join ridge “bumps” instead of side bars
- On ribbing, you may follow the line of knit columns to keep the rib pattern aligned
For mattress or bedding covers, the goal is to keep patterns lined up so the seam doesn’t draw attention or twist the fabric.
Is the mattress stitch strong enough for bed covers?
The mattress stitch is commonly used for:
- Sweater side seams
- Pillow covers
- Blankets and throws
These are all items that experience regular use. For mattress-related knitted pieces, the seam is generally strong enough for:
- Decorative toppers
- Light protective covers
- Pillow or cushion covers used on the bed
As with any seam, strength depends on yarn type, tension, and how the item is used.
How Does This Help With Overall Mattress Use & Care?
While the mattress stitch itself is a knitting technique, it supports good mattress care by helping you:
- Create snug, removable covers that protect your mattress from dust and everyday wear
- Maintain a smooth bed surface with neatly finished throws and toppers
- Repair or resize knitted bedding items instead of replacing them
A well-finished knitted cover can be removed, washed according to its care instructions, and returned to the mattress without stretched-out seams or obvious joins.
✅ Quick Mattress Takeaways
Key points consumers should understand about How To Do The Mattress Stitch In Knitting
- Mattress stitch = invisible seam: It’s a knitting method to join two pieces edge to edge with a clean look.
- Ideal for bed items: Especially useful for knitted mattress covers, throws, and pillow covers that sit on or near your mattress.
- Work under the “bars”: Insert your needle under the horizontal bars between the first and second stitches on each piece, alternating sides.
- Tighten gradually: Seam a few centimeters, then gently pull the yarn to zip the pieces together without puckering.
- Comfort-focused: A flat mattress stitch seam helps keep bedding smooth, reducing ridges that might show or be felt under sheets.
- Supports mattress care: Neatly seamed, removable knitted covers can help protect your mattress surface and keep your sleep environment tidy.
With a basic understanding of how to do the mattress stitch in knitting, you can create or maintain mattress-friendly knitted pieces that look polished and feel comfortable in everyday use.