How To Do Mattress Stitch: A Simple Guide for Neat, Invisible Seams
If you’re searching for “How To Do Mattress Stitch”, you’re usually looking for a way to join two pieces of fabric together with a strong, nearly invisible seam. This technique is often used in knitting and upholstery, and the same basic method can help you repair a mattress cover, topper cover, or other padded textile neatly.
Below is a clear, step‑by‑step FAQ to help you understand what mattress stitch is, how to do it, and when to use it.
What Is Mattress Stitch?
Mattress stitch is a hand‑sewing technique that joins two edges so the seam is:
- Flat
- Secure
- Almost invisible from the outside
It is most common in knitwear (like sweater seams), but the same concept applies when you want to close or repair a mattress cover seam or padded fabric panel without a bulky, obvious stitch line.
When people ask How To Do Mattress Stitch, they usually want a tidy repair that does not bunch, gape, or create a ridge they can feel.
When Would You Use Mattress Stitch on a Mattress or Cover?
You might use a mattress stitch–style seam when:
- A zipper cover seam has opened and needs closing.
- A tuft or side seam has come loose on a mattress topper or padded cover.
- You are joining two fabric panels of a custom cover or pad.
- You want a discreet repair instead of a visible topstitch.
For an actual mattress core (springs, foam, or internal layers), it is best not to open or alter anything beyond the removable cover. Mattress stitch is most appropriate for outer fabric and covers, not structural components.
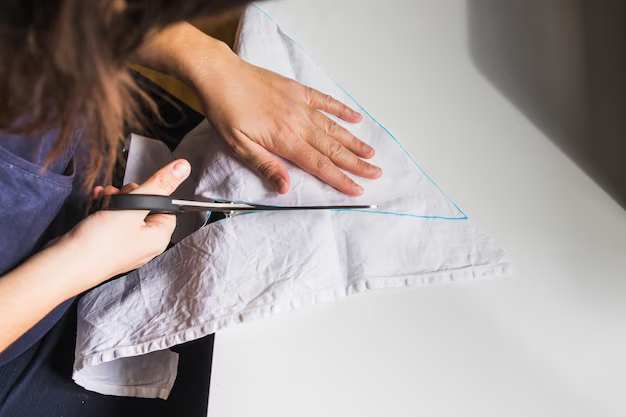
How To Do Mattress Stitch: Step-by-Step
1. What tools do I need?
For a basic mattress stitch on a mattress cover or thick fabric, you’ll typically need:
- Strong thread (polyester or upholstery thread)
- Blunt or slightly rounded needle (tapestry or upholstery needle)
- Scissors
- Pins or clips (optional, to hold the edges together)
If the cover is removable, taking it off the mattress can make stitching much easier and more accurate.
2. How do I prepare the fabric edges?
- Clean the area if needed and let it dry fully.
- Turn under any frayed threads or loose fibers so the edges look smooth.
- Align the two edges you want to join so they meet evenly.
- If helpful, pin or clip the edges together at a few points to keep them from shifting.
The neater the starting edges, the more invisible the finished mattress stitch will look.
3. How To Do Mattress Stitch: The Basic Motion
Here is the core technique many people are looking for when they ask How To Do Mattress Stitch:
Start from the inside
- If possible, begin from the inside of the cover so your knot is hidden.
- Secure your thread with a small knot or a few backstitches.
Work across the “ladder”
Imagine each fabric edge has tiny horizontal “rungs” of thread at the seam allowance:- Insert the needle from back to front into one edge, catching a small horizontal thread or a little bite of fabric close to the fold.
- Pull the thread through, but not too tight.
- Move across to the opposite edge, insert the needle from back to front at the same height, and pull through.
Alternate sides
Move back and forth between the two sides, always:- Taking small, even bites of fabric,
- Staying at roughly the same distance from the edge on each side.
Tighten gently every few stitches
After 3–4 stitches:- Gently pull the working thread.
- You’ll see the seam edges draw together like a zipper, hiding the stitch.
Finish securely
- Take a final small stitch on the inside.
- Knot the thread securely and bury the tail in the seam allowance where it won’t show.
The result is a flat, closed seam that looks almost as if it was never opened.
4. How tight should mattress stitch be?
A common concern is whether to pull as tight as possible. With mattress stitch, firm but not over‑tight is best:
- Too loose → seam may gap.
- Too tight → fabric can pucker or create a visible ridge.
Aim for the seam to lie flat when the cover is relaxed and still close completely when the mattress is under normal use.
Common Questions About Mattress Stitch on Mattress Covers
Can I use mattress stitch on stretchy knit covers?
Yes, but:
- Take smaller, closer stitches.
- Do not over‑tighten, so the seam can move slightly with the fabric.
- Use a slightly stretchy or strong polyester thread for durability.
Is mattress stitch strong enough for a frequently used mattress?
For minor seam openings in a cover, a properly done mattress stitch can be quite durable. For large tears, worn‑out fabric, or stitching that keeps failing, the cover may be too damaged for a long‑term repair, and replacement or professional help is often more practical.
What if the original seam allowance is gone?
If the fabric is very frayed or the original seam line has worn away:
- Trim only the worst fraying, if any.
- Work your mattress stitch slightly farther in from the edge to catch stronger fabric.
- Expect the finished seam to be marginally narrower than the original.
✅ Quick Mattress Takeaways
Key points consumers should understand about How To Do Mattress Stitch
- What it is: A hand‑sewing method that joins two fabric edges with a flat, almost invisible seam.
- Best use: Repairing or closing mattress covers, toppers, and padded textiles, not internal mattress layers.
- Tools needed: Strong thread, blunt or upholstery needle, scissors, and optional pins or clips.
- Basic technique:
- Align edges
- Take small, alternating stitches from each side
- Gently tighten every few stitches to “zip” the seam closed
- Tension matters: Pull firmly but not harshly to avoid puckering or gapping.
- Durability: Well‑done mattress stitch is typically secure for everyday use on minor seam repairs, though very damaged fabric may need more extensive work.
Understanding How To Do Mattress Stitch gives you a simple, low‑bulk way to repair or join fabric around your mattress and bedding. With a bit of patience and even stitching, you can restore seams to look neat, feel smooth, and blend in with the rest of the cover.