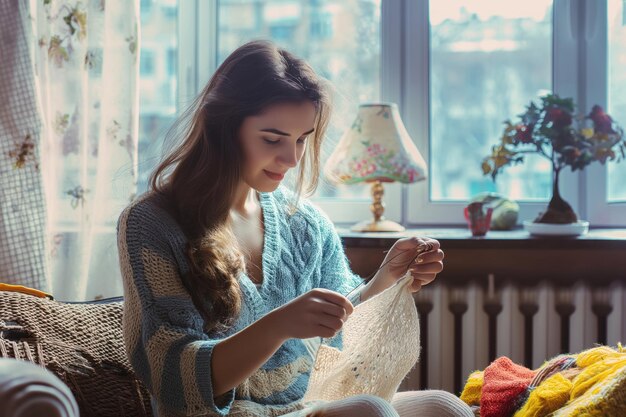
How To Do a Mattress Stitch in Knitting: A Simple, Step‑by‑Step FAQ
If you’re searching for “How To Do a Mattress Stitch In Knitting”, you’re likely looking for a clear, no‑nonsense guide to seaming your knitted pieces together neatly. This FAQ walks through what mattress stitch is, why knitters use it, and how to do it in easy steps—plus how this “mattress-style” joining idea parallels the neat, invisible joins you might expect in a well‑finished mattress or mattress cover.
What is the mattress stitch in knitting?
The mattress stitch is a way of seaming two pieces of knitting together so the join is almost invisible from the right side. It’s commonly used for:
- Side seams on sweaters
- Joining front and back panels
- Finishing cushion or mattress-style covers
It’s called a “mattress” stitch partly because of the snug, hidden seam it creates—similar in spirit to how mattress panels or covers are joined so that edges look smooth, not bulky.
Why does mattress stitch matter for neat, durable seams?
When you learn how to do a mattress stitch in knitting, you get:
- A clean, professional-looking edge: The seam disappears into the existing stitches.
- A strong but flexible join: Good for items that will be moved, washed, or slept on, like knitted mattress toppers, bed throws, or cushion covers.
- Better comfort: A bulky or twisted seam can be uncomfortable where your body rests against it, much like a lump or ridge on a mattress.
For any knitting that will be used on or around the bed—blankets, decorative throws, or covers—a flat, smooth seam can feel more comfortable and look more polished.
How To Do a Mattress Stitch in Knitting (Step by Step)
Here’s a straightforward method for seaming two stockinette pieces together along their side edges.
1. What you’ll need
- Your two knitted pieces, blocked if possible
- A blunt tapestry (yarn) needle
- Matching yarn (often the same yarn used to knit the project)
- A flat surface to lay the pieces side by side
2. Align your pieces
Lay the pieces right side up, side by side, with the edges you’re joining touching.
You should see a column of “V” stitches at each edge. Between the outermost stitches and the edge of the fabric, there’s usually a vertical line of bars—this is where the mattress stitch goes.
3. Anchor your yarn
- Thread your tapestry needle with a comfortable length of yarn.
- Start at the bottom of the seam.
- Secure the yarn with a small knot or by weaving it in on the wrong side.
4. Find the “bars” between stitches
On the right side of stockinette:
- Look at the edge stitches.
- Between the first and second column of stitches, you’ll see horizontal bars of yarn running up the work.
- These bars are what you’ll pick up with the needle.
You’ll be working back and forth between the pieces, catching these bars alternately on each side.
5. Sew up the seam
- Insert the needle from bottom to top under two horizontal bars on the right piece.
- Pull the yarn through, but not too tight.
- Move to the left piece, insert the needle from bottom to top under two bars there.
- Repeat: right side, two bars; left side, two bars.
Every few stitches, gently pull the working yarn to snug the seam. You’ll see the two edges zip together, making the join nearly invisible.
How tight should my mattress stitch be?
A common concern when learning how to do a mattress stitch in knitting is tension.
- Too tight: The fabric puckers, and the seam feels stiff—much like an overly tight mattress cover pulling the surface in.
- Too loose: Gaps show between the pieces and the seam may look messy.
Aim for a tension where:
- The seam is flat and smooth
- The fabric lies naturally without pulling
- The join is secure when you gently tug the pieces apart
🧵 Tip: After every 4–6 stitches, stop and adjust. Gently pull the seaming yarn to close the gap, checking both sides.
Can I use mattress stitch on other knitting textures?
Yes. The basic principle is the same, but where you insert the needle may change slightly:
- Garter stitch: You can seam under the horizontal ridges, often picking up one ridge on each side.
- Ribbing: Line up the knit columns and seam just inside them so the rib continues across the join.
- Chunky or textured blankets: Use slightly longer “steps” (more bars at a time) to avoid bulk, but keep the seam flat, especially if the piece will be used on a mattress or as bedding.
How does this relate to mattress use and care?
While mattress stitch is a knitting technique, it connects naturally to mattress use & care when you’re making:
- Knitted mattress toppers or protectors
- Bed runners and throws that lie directly on the mattress
- Cushion or pillow covers used for sleeping areas
For these items, a flat, even seam helps:
- Avoid noticeable ridges under sheets or against skin
- Keep covers sitting smoothly on the mattress surface
- Maintain a tidy appearance when the bed is made
Think of mattress stitch as the knitting equivalent of a well-finished mattress seam: neat, dependable, and unobtrusive.
✔️ Quick Mattress Takeaways
Key points consumers should understand about How To Do a Mattress Stitch In Knitting
- Mattress stitch creates an almost invisible seam on the right side of knitted fabric.
- It’s especially useful for side seams, blankets, and mattress-style covers where comfort and smoothness matter.
- Work with the right sides facing up, picking up the small horizontal bars between stitch columns on each edge.
- Join two bars on one side, then two bars on the other, zipping the seam closed every few stitches.
- Keep your tension even but not tight so the seam lies flat, like a smooth mattress surface without ridges.
- The same technique adapts to stockinette, garter, and ribbing, with small adjustments to where you insert the needle.
By understanding how to do a mattress stitch in knitting, you can create bed- and mattress-related knit pieces that look tidy, feel comfortable, and hold up well with regular use and care.