How To Do a Mattress Stitch: Step‑by‑Step Guide for Neat, Invisible Seams
If you’re searching for “How To Do a Mattress Stitch”, you’re likely trying to join two pieces of fabric, knit, or upholstery in a way that looks smooth and almost invisible. Despite the name, the mattress stitch is more common in sewing and knitting than in everyday mattress repair, but the principle is the same: a strong, discreet seam that lies flat.
This FAQ-style guide explains what a mattress stitch is, when to use it, and how to do it confidently, with clear steps and tips.
What is a mattress stitch?
A mattress stitch is a hand-sewing technique used to join two edges together so the seam is nearly invisible from the outside. It’s especially popular for:
- Knitted pieces (like sweater panels)
- Upholstery seams
- Fabric panels and covers
Instead of overlapping the fabric, the mattress stitch brings the edges together edge-to-edge, creating a flat, smooth finish.
Why would I use a mattress stitch on bedding or covers?
In the context of mattress use & care, people ask how to do a mattress stitch when they want to:
- Repair a torn mattress cover or encasement
- Close a seam after adding or adjusting padding in a cover
- Join two pieces of fabric used as a protective layer over a mattress
For full mattress construction or deep structural repairs, professional upholstery or mattress services are usually more appropriate. The mattress stitch is best for surface fabrics and covers, not for the inner support layers.
How To Do a Mattress Stitch: What you need
Before you start, gather a few basic items:
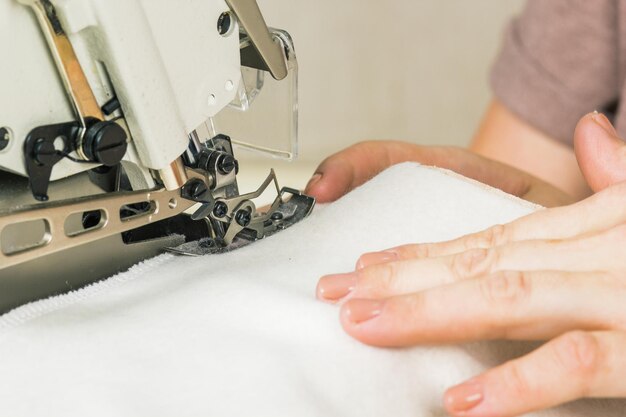
- Needle: A blunt tapestry needle for knitting, or a sharp hand-sewing needle for woven fabric
- Thread or yarn: Match the color and type to what you’re sewing
- Scissors: For trimming thread
- Pins or clips (optional): To hold edges together
- Good lighting: Helps you see the exact points you’re stitching
Step‑by‑step: How To Do a Mattress Stitch
1. Align the edges
Lay the pieces flat and side by side, right side facing up:
- Match the rows (for knitting) or the weave lines (for fabric)
- Avoid overlapping; the edges should butt up against each other
This alignment is what gives the seam its flat, nearly invisible look.
2. Secure your thread
- Thread your needle and make a small knot at the end
- Insert the needle from the wrong side (inside) of one edge so the knot is hidden
- Pull the thread through until the knot catches
3. Identify your anchor points
For different materials, you’ll pick up stitches slightly differently:
- Knitted fabric: Look for the horizontal bars between the edge stitches
- Woven fabric: Use the tiny loops or threads just inside the cut edge, not the very outermost fraying threads
- Upholstery covers: Work just inside the edge seam, catching sturdy threads
The key is to pick up consistent points on each side so the edges line up neatly.
4. Work the mattress stitch
This is the core of How To Do a Mattress Stitch:
- Insert the needle into the first anchor point on the left edge and pull through.
- Move across to the corresponding point on the right edge and pull through.
- Go back to the next point up on the left side and pull through.
- Repeat: left → right → left → right, always moving upward along the seam.
You’re essentially weaving back and forth between the two sides, picking up small, even bites of fabric or knitting.
5. Tighten the seam gradually
Every few stitches:
- Gently pull on the working thread
- Watch the gap between the edges close up
- Adjust the tension so the seam lies flat, not puckered
Avoid over-tightening. You want the seam to be snug but flexible.
6. Finish and secure the end
When you reach the end:
- Make one or two small backstitches (stitches that double back on themselves) to secure the thread
- Tie a discreet knot on the wrong side if possible
- Trim the excess thread, leaving a short tail
For removable covers, you can tuck the tail inside the seam for a cleaner look.
Common questions about mattress stitching
Is mattress stitch strong enough for mattress covers?
A properly done mattress stitch can create a sturdy seam for light to moderate stress areas, like:
- Small tears in a cover
- Closing an opening in a fabric encasement
For areas under heavy tension or for frequent high-stress use, a reinforced machine stitch or professional repair may last longer.
Can I use mattress stitch on stretchy fabric?
Yes, but:
- Use a slightly stretchy thread if possible
- Keep your stitches looser to allow for movement
- Test a small area to see how the seam behaves when stretched
What if the seam looks crooked or puckered?
Common causes include:
- Stitches are uneven in size
- Thread is pulled too tight
- Corresponding points on each side don’t match
You can usually fix this by unpicking a few stitches and redoing them with more consistent spacing and gentler tension.
✅ Quick Mattress Takeaways
Key points consumers should understand about How To Do a Mattress Stitch
- Mattress stitch = invisible join: It’s a hand-sewing method that creates a flat, almost invisible seam between two edges.
- Best for covers and fabrics: Ideal for mattress covers, encasements, and fabric panels, not for internal mattress structure.
- Align edges carefully: Good results depend on matching edges and picking up consistent points on each side.
- Weave back and forth: Work the needle from left to right in small, even stitches, tightening the seam gradually.
- Avoid over-tightening: A smooth mattress stitch seam should be snug but not puckered or stiff.
- Practice helps: Trying the technique on scrap fabric or old bedding first can make repairs on important items more successful.
Knowing How To Do a Mattress Stitch gives you a practical way to tidy up seams, repair covers, and keep bedding looking neat. With a bit of patience and careful stitching, you can achieve a smooth, almost invisible join that blends naturally into the surrounding fabric.